


What's Next(.js)? | Create Cover Image with Next.js API Routes
Let's create an SVG generating API with Next.js


Hi everyone! 🙋🏻♀️
Welcome to the second post of What's Next(.js)? the series! In this post, I'll walk over the process of creating a Next.js app that creates an SVG generating API with Next.js API routes. Starting from the project setup and ends with a working API! It is my first ever series, so wish me luck, and any comments or inputs are deeply appreciated ✨. Well, let's start!
Before we start...
I feel the need to address the elephant in the room. In this post, we will go through how to generate SVG and display it as an image, but unfortunately, we can't use SVG as a cover image or OG image. Sorry for the clickbait-y title! 🙏🏼
Steps
The whole process will be divided into these few steps:
- setup the project
- clean up some codes
- choose or design an SVG template
- write the API
- display the SVG as an image.
Setup
First thing first, we need to create a new Next.js app, I used their CLI tool which is really easy to use. To get started, just type:
npx create-next-app
# or
yarn create next-app
Because I want to use Typescript in this project, I added --typescript behind the script. So, it will be like this:
npx create-next-app --typescript
# or
yarn create next-app --typescript
Enter your app name and it's done, so convenient! After the installation is complete, we can start running our development server:
npm run dev
# or
yarn dev
Congrats! 🎉 Your app is now up and running.

Clean Up
Now, it's time to clean up some of the boilerplate codes. What to clean is up to you, but for me, I left everything untouched aside from pages/index.tsx. I deleted some texts, and now the code looks like this:
// pages/index.tsx
import type { NextPage } from "next";
import Head from "next/head";
import styles from "../styles/Home.module.css";

const Home: NextPage = () => {
  return (
    <div className={styles.container}>
      <Head>
        <title>OG Image (Next.js) | Jade</title>
        <meta
          name="description"
          content="OG Image (Next.js) | Made with 🧡  by Jade"
        />
        <link rel="icon" href="/favicon.ico" />
      </Head>

      <main className={styles.main}>
        <h1 className={styles.title}>
          Welcome to OG Image (<a href="https://nextjs.org">Next.js</a>) by Jade
        </h1>
        {/* DISPLAY IMAGE HERE */}
      </main>
    </div>
  );
};

export default Home;
Remember to change my name (Jade) into your name, and now we can continue to the next step.
Choose an SVG Template
What do I mean by SVG template? Because we are making an SVG generator, we need a blank design to customize later on. To use this template as our base for the cover image, we should set the dimensions to 1200px x 630px (recommended by Hashnode). But, if you don't want to make a cover image, you can set the sizes to anything that you like. The template is an image that is made with SVG, it can have any kind of design that you'd like. For me, I just created a white rectangle with a gradient border. You can see and copy the code here:
  <svg width="1200" height="627" viewBox="0 0 1200 627" fill="none" xmlns="http://www.w3.org/2000/svg">
    <style>
      .title { font: bolder 72px Helvetica; color: #252A31; height: 430px; display: flex; align-items: flex-start; justify-content: flex-start; }
      .subtitle { font: bold 40px Helvetica; color: #252A31; height: 50px; display: flex; align-items: flex-end; justify-content: flex-start; }
    </style>
    <rect x="10" y="10" width="1180" height="607" rx="10" fill="white"/>
    <rect x="10" y="10" width="1180" height="607" rx="10" stroke="url(#paint0_angular)" stroke-width="20"/>
    <foreignObject x="80" y="80" width="1040" height="480">
      <div class="title" xmlns="http://www.w3.org/1999/xhtml">
        Create Cover Image with Next.js API Routes
      </div>
      <div class="subtitle" xmlns="http://www.w3.org/1999/xhtml">
        What's Next(.js)? ● jade.hashnode.dev
      </div>
    </foreignObject>
    <defs>
    <radialGradient id="paint0_angular"  gradientUnits="userSpaceOnUse" gradientTransform="skewX(300) scale(3)">
    <stop offset="14.5833%" stop-color="#FA5182"/>
    <stop offset="65.1042%" stop-color="#6AC6C8"/>
    <stop offset="85.4167%" stop-color="#973D99"/>
    </radialGradient>
    </defs>
  </svg>
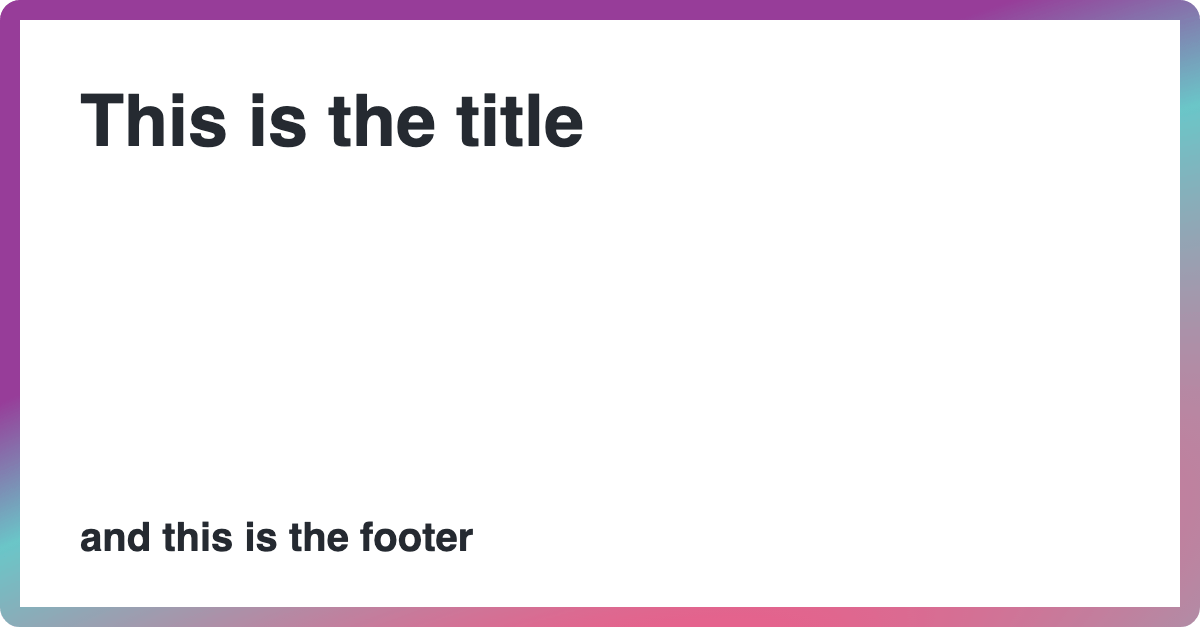
This SVG code is the one to the cover image of this post 👆🏼! You can change the texts inside to your liking and see how it looks.
Before writing this project, I didn't know much about SVG, and well, I still don't. But, I now know about foreignObject! It allows us to embed HTML into our SVG code. This is a game-changer (for me) as it allows more flexibility. We can insert a div element and add css styling like flex to create an auto aligning and overflowing content. Without this, we can still set the text alignment with text-anchor, but it's more complicated to handle the overflow problem. The drawback of this approach is the need for a browser context, which is not a problem at all if we were to display the SVG image on a web page. But, Next.js API routes run in a Node.js environment, so foreignObject is not supported.
Write the API
Before writing the API itself, we should start by making a util function that returns the SVG template. It is a simple, pure function that has two parameters, which are title and footer. In the code above, the title is Create Cover Image with Next.js API Routes and the footer is What's Next(.js)? ● jade.hashnode.dev. So, we create a new file _svg.ts inside the pages/api folder, and the underscore in front of the filename means that it's a private file and will not be used as an API endpoint.
// pages/api/_svg.ts
export default function getSvg(title: string, footer: string): string {
  const svg = `
  <svg width="1200" height="627" viewBox="0 0 1200 627" fill="none" xmlns="http://www.w3.org/2000/svg">
    <style>
      .title { font: bolder 72px Helvetica; color: #252A31; height: 430px; display: flex; align-items: flex-start; justify-content: flex-start; }
      .subtitle { font: bold 40px Helvetica; color: #252A31; height: 50px; display: flex; align-items: flex-end; justify-content: flex-start; }
    </style>
    <rect x="10" y="10" width="1180" height="607" rx="10" fill="white"/>
    <rect x="10" y="10" width="1180" height="607" rx="10" stroke="url(#paint0_angular)" stroke-width="20"/>
    <foreignObject x="80" y="80" width="1040" height="480">
      <div class="title" xmlns="http://www.w3.org/1999/xhtml">
        ${title}
      </div>
      <div class="subtitle" xmlns="http://www.w3.org/1999/xhtml">
        ${footer}
      </div>
    </foreignObject>
    <defs>
    <radialGradient id="paint0_angular" gradientUnits="userSpaceOnUse" gradientTransform="skewX(300) scale(3)">
    <stop offset="14.5833%" stop-color="#FA5182"/>
    <stop offset="65.1042%" stop-color="#6AC6C8"/>
    <stop offset="85.4167%" stop-color="#973D99"/>
    </radialGradient>
    </defs>
  </svg>
  `;

  return svg;
}
The util function is done, now we can start writing our API. You'd realized that there is a file named hello.ts inside the pages/api folder, we can rename it to index.ts or anything that you want. An important thing to know, Next.js uses file-system-based routing for its pages and also API routes. This means each file inside the pages folder is treated as a single page, and files inside the pages/api folder are individual API endpoints. For example, the file pages/api/hello.ts will result in an endpoint to /api/hello and pages/api/index.ts will map to the /api/ endpoint. So, inside the just renamed index.ts file, we can write:
// pages/api/index.ts
import type { NextApiRequest, NextApiResponse } from "next";
import getSvg from "./_svg";

export default async function handler(
  req: NextApiRequest,
  res: NextApiResponse
) {
  const svg = getSvg(String(req.query.title), String(req.query.footer));
  res.statusCode = 200;
  res.setHeader("Content-Type", "image/svg+xml");
  res.setHeader(
    "Cache-Control",
    "public, immutable, no-transform, s-maxage=31536000, max-age=31536000"
  );
  return res.end(svg);
}
Let's look at the code,
- we export a function
handlerbecause for an API route to work, we need to export a default function (you're free to choose any function name!) with two parameters, which arereqandres reqstands for the API request (HTTP Incoming Message instance) andresis the API response (HTTP Server Response) instancereqincludes some useful built-in middlewares likereq.querywhich is an object containing the query string- which in this case, we send our
titleandfooterrequest through typing in the URL likehttps://localhost:3000/api?title=TITLE&footer=FOOTER - the
getSvgfunction will then hasTITLEandFOOTERas the arguments - after we get the
svgtemplate, now we can send the template over to the client with an HTTP response - first, we set the response status code to
200as it indicates the request has succeeded - second, set the response header
Content-Typetoimage/svg+xmlbecause we returned an SVG code - third, set the response header
Cache-Controlto enable caching (read more about the settings here) - last, we end the HTTP call with sending the
svgto the client.
Let's try our new API! Go to this URL http://localhost:3000/api?title=This is the title&footer=and this is the footer and what do you see? Do you see this image down here? 👇🏼
 We can now proceed to the last step 👏🏼
Display the SVG as Image
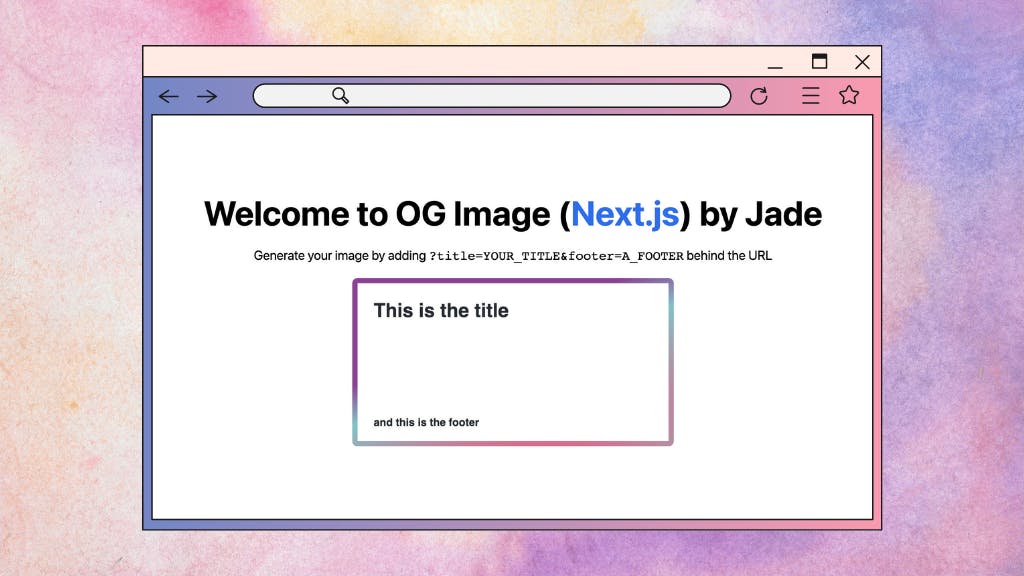
We want to see our newly generated image on our web app, but how? Still remember this code {/* DISPLAY IMAGE HERE */} right inside our pages/index.tsx file? We need to replace this with an img tag:
<img alt={querystring} src={`/api${querystring}`} width="600px" />
See that the src points to our API endpoint? That's how we render our SVG code as an image. Since we want to generate different images with different inner texts, we need a way to tell our API our request. And yes, it's the querystring! Just like our API, our web app can also reads the query parameter by using useRouter API from next/router. When we go to the URL http://localhost:3000/?title=This is the title&footer=and this is the footer, we'll have the query object (from useRouter) as:
{ "title": "This is the title", "footer": "and this is the footer" }
To use this information, we can add this piece of code right before the return statement inside our Home component in pages/index.tsx file:
// pages/index.tsx
import type { NextPage } from "next";
import Head from "next/head";
// also don't forget to import useRouter
import { useRouter } from "next/router";
import styles from "../styles/Home.module.css";

const Home: NextPage = () => {
  // start from here
  const { query } = useRouter();
  const querystring = `?title=${query.title}&footer=${query.footer}`;
  // to here

  return (...)
};

export default Home;
Now, let's go to this URL (http://localhost:3000/?title=This is the title&footer=and this is the footer) and we'll finally see our generated SVG image! 🥳
What's Next?
Congratulations! You've reached the end of the post, wish you can follow through the steps without any problems. If you have any questions, please feel free to leave a comment or two! In the next post, we will try to build a simple form to allow more customization, like adding more texts or even images to our generated image. See the whole plan and a bit of a back story here.
P.S. You're very welcome to leave your thoughts, comments, or opinions!